How to Set Up an ASIC Miner
This article provides a comprehensive step-by-step manual to help you properly launch your ASIC miner, avoid common beginner mistakes, and optimize your equipment’s profitability in the current 2026 mining landscape.
Preparation: What to Check Before Powering Up
Before diving into how to connect an ASIC, you must prepare your infrastructure. Modern models (such as the Antminer S21 or Whatsminer M60 series) consume between 3.5 and 5 kW. Standard residential wiring in older buildings is not designed for such loads.
- Electrical Wiring: Ensure your copper cable cross-section is at least 2.5 mm² per device. Ideally, allocate a dedicated circuit breaker for each miner.
- Voltage: Most ASIC miners operate in the 200–240V range. If your voltage drops to 180-190V, the device may fail to start, or the Power Supply Unit (PSU) will wear out quickly. An industrial-grade voltage stabilizer is highly recommended.
- Internet: Stability is more important than speed. While 1 Mbps is enough for mining, low latency (ping) to stratum servers is critical. Use only a wired Ethernet connection. Wi-Fi adapters cause micro-disconnects, leading to rejected shares and decreased profits.
- Ventilation: ASICs generate an enormous amount of heat. For indoor operation, you will need a noise-reduction box (shumobox) and a forced-air exhaust system to vent hot air outside or into a ventilation shaft.
Physical Equipment Connection
Once your site is ready, it’s time to gather the necessary accessories. You will need two heavy-duty power cables (C13 or C19 standard, depending on your PSU model) and an RJ45 patch cord.
- Inspection: Gently shake the powered-off device. If you hear rattling inside, a heatsink may have detached. Do not turn on such a miner, as it will lead to instant chip overheating.
- PSU Connection: Connect the power supply to the control board and hash boards. In modern “dual-tower” models, the PSU is usually integrated into the chassis.
- Network: Plug the Ethernet cable into the LAN port on the control board.
- Launch: Plug the power cables into the outlets. The fans will ramp up to maximum RPM for a few seconds — this is the self-diagnostic mode. After 2–5 minutes, the device should stabilize and receive an IP address.
Locating Your ASIC on the Local Network
To access the ASIC’s settings, you need to find its address on your home network. By default, devices have DHCP enabled, meaning the router assigns them an address automatically.
Methods to Find Your Miner’s IP:
| Method | Tool | Best For |
|---|---|---|
| Specialized Software | BTC Tools or IP Reporter | The fastest way to find multiple devices at once. |
| Router Admin Panel | Web Browser | The “Device List” or “DHCP Clients” section. Look for names like “Antminer”. |
| On-Device Button | IP Report Button | Press the button on the ASIC, and the PC utility will instantly highlight its IP. |
Once you have the address (e.g., 192.168.1.50), enter it into your browser’s address bar. An authorization window will appear. Standard credentials: root / root or admin / admin.
Mining Configuration (Pool Settings)
This is the critical stage that determines where your earned rewards will be sent. To configure the ASIC, you need to enter the server addresses and your worker details.
Here is the process using the Headframe pool as an example:
- Navigate to the Miner Configuration (or Settings) section.
- URL: Paste the stratum address provided by the pool.
- Pool 1 (Primary)
- Pool 2 (Failover)
- Worker: Enter your pool username followed by a dot and the miner’s name. Example:
User.S21. - Password: Usually left as ‘x’ or ‘123’.
- Click Save & Apply.
Important: Choose pools with an FPPS payout system (like Headframe). This ensures you receive not only the block reward but also a share of the Bitcoin network transaction fees, increasing revenue by 3-7% compared to standard PPS.
Fine-Tuning and Optimization
Properly setting up an ASIC miner means finding the balance between power consumption and hashrate.
- Operating Modes: Most manufacturers provide factory presets:
- Low Power: Saves up to 20% on electricity with a 10-15% drop in hashrate. Ideal for high electricity tariffs.
- Normal: The factory standard.
- High Performance: Maximum hashrate, but carries a higher risk of overheating.
- Custom Firmware: If your warranty has expired, you can install third-party software (e.g., VNISH or Braiins). This allows for per-chip tuning and undervolting, which extends equipment life and improves efficiency.
- Static IP: In the Network settings, it is recommended to switch from DHCP to Static. This saves you from searching for the device every time the router reboots.
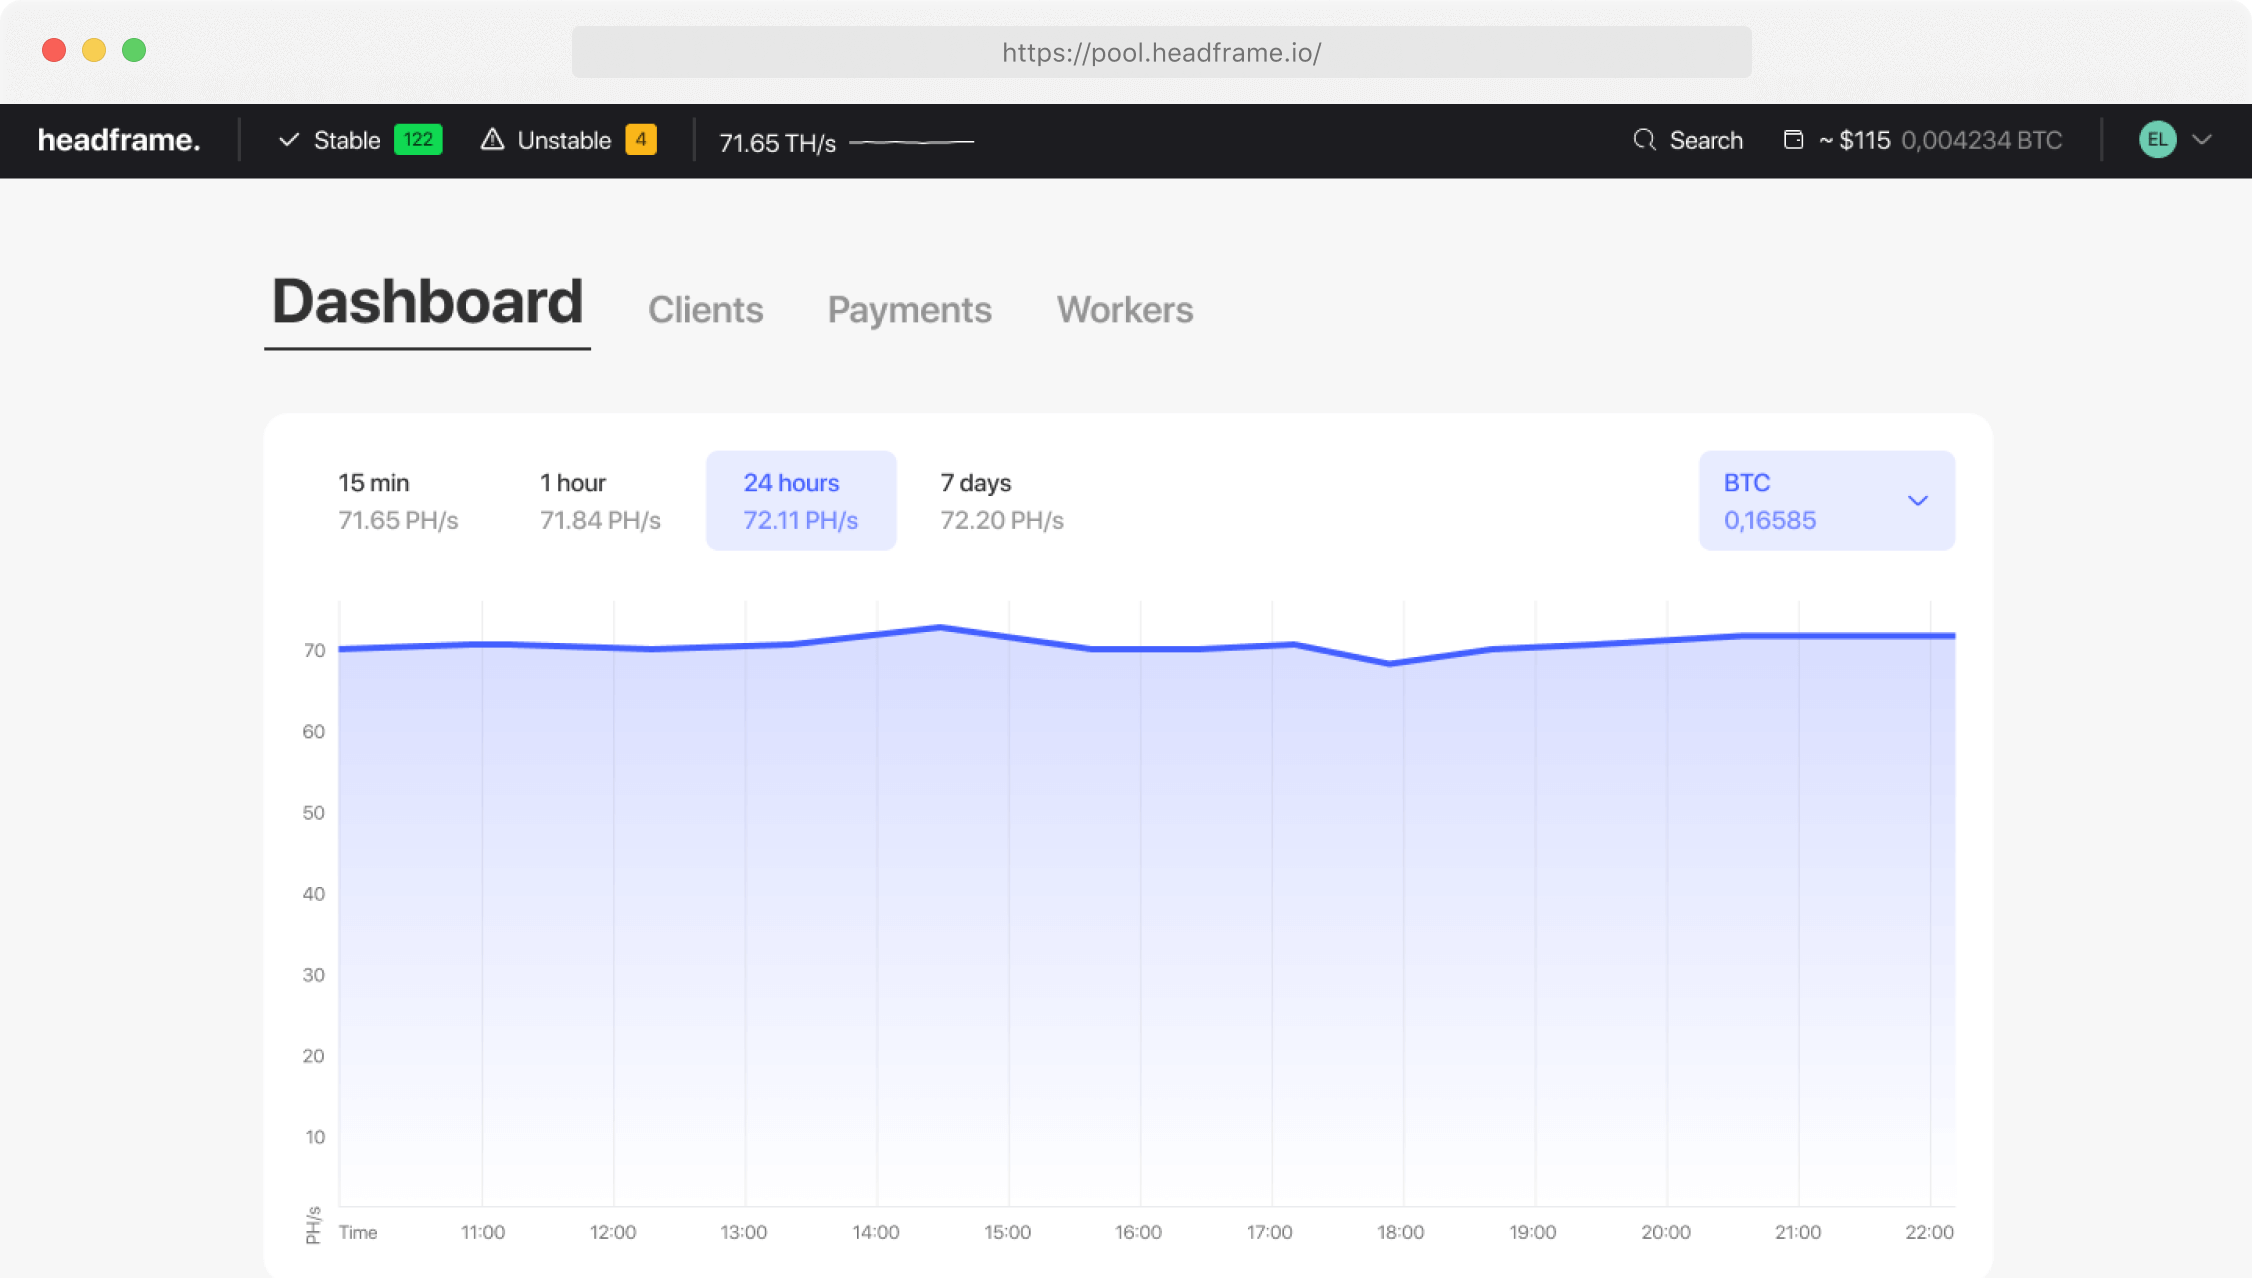
Monitoring and Verifying Performance
After configuring your ASIC, ensure it reaches its target performance.
What to Check in the Web Interface:
- Hashrate RT: Real-time hashrate. It should match the advertised spec after 15-20 minutes of operation.
- Status (Real-time): All chips should be marked as “O” (green). Seeing an “X” or “-” indicates a hardware fault.
- Temperature: For modern chips, the norm is up to 75-80°C at the outlet. If it’s higher, check your ventilation.
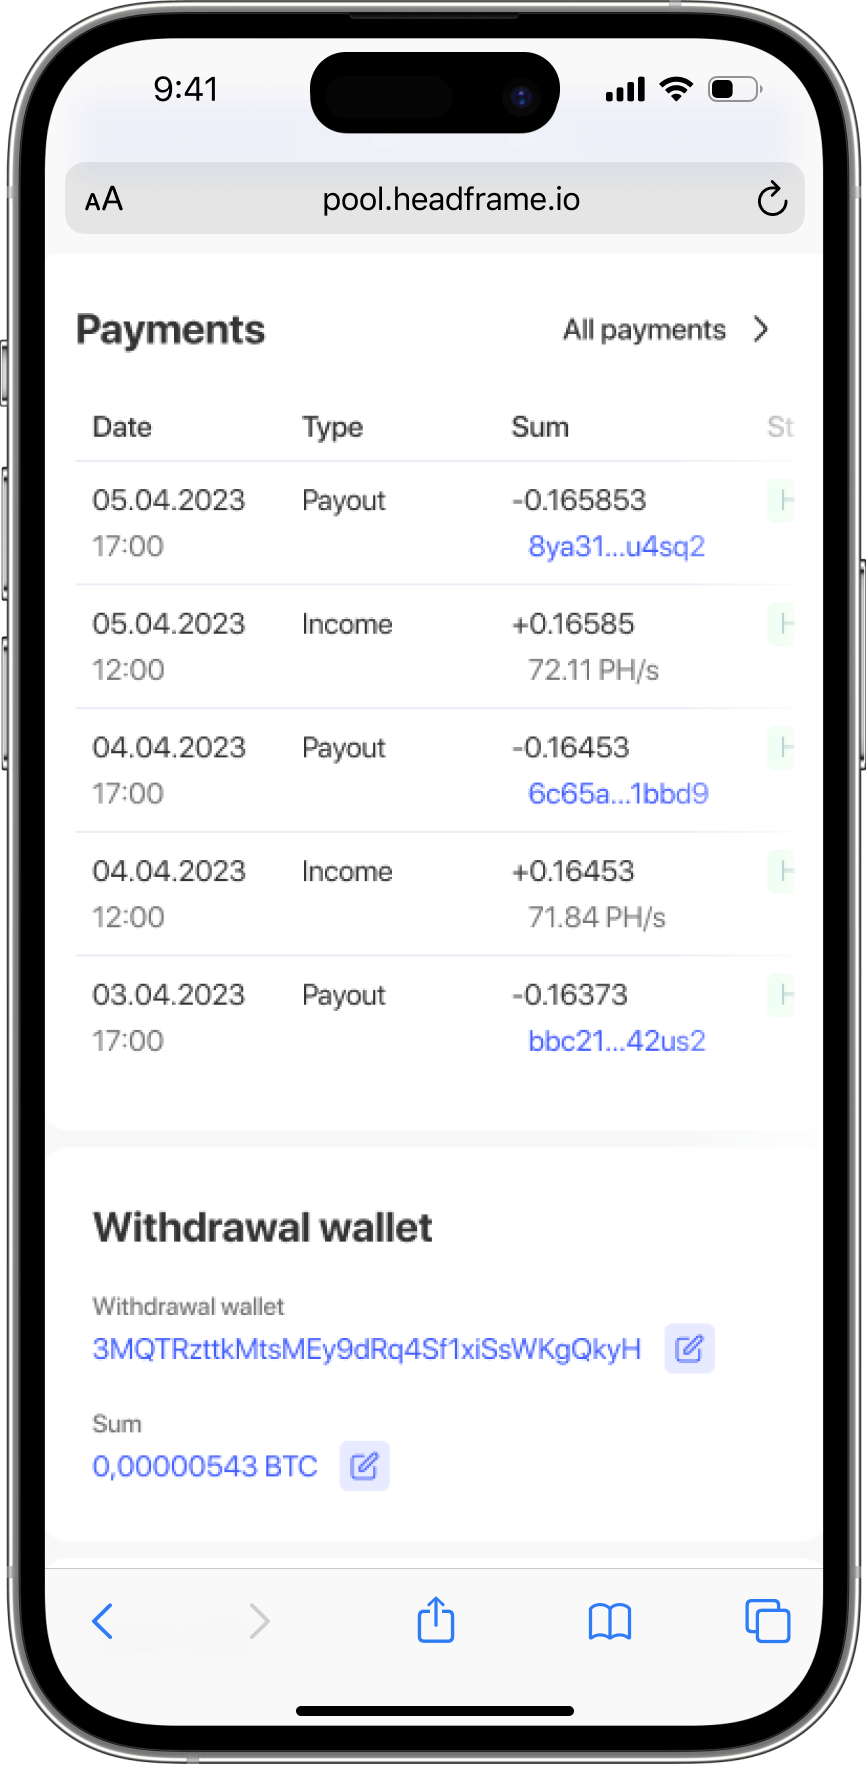
Remote Control: You don’t need to stay logged into the web interface. It’s much more convenient to use the pool’s mobile app for monitoring.
Maintenance and Common Troubleshooting
Even if you know how to launch an ASIC, the hardware requires regular care.
Maintenance Schedule:
- Dusting: Every 2-3 months, clean the heatsinks with compressed air. Dust is the primary enemy of cooling.
- Connector Check: High current can cause power connectors to burn. Inspect plastic connectors monthly for any signs of browning or melting.
- Firmware Updates: Check official websites for updates. New software often includes security patches and algorithm optimizations.
Typical Faults:
- ASIC Not Found on Network: Replace the patch cord or try a different port on the router.
- Low Hashrate: Check the PSU. If the voltage is insufficient, the boards will not run at full capacity.
- Zero Hashrate on Pool: Check your Worker ID spelling. A single-character typo means you are mining for someone else or into a void.
Conclusion and Recommendations
You now know how to connect an ASIC miner and get it running for a stable income. In 2026, Bitcoin mining has become a professional industry where every detail matters.
Final Checklist:
- Ensure high-quality power and cooling.
- Use a reliable pool with transparent payouts. At Headframe, we offer a 0.9% commission and daily payouts with no hidden fees.
- Use mobile apps for monitoring to avoid downtime.
- Perform regular cleaning and technical inspections.
Properly connecting your ASIC is the foundation of your passive income. By following this guide, you minimize the risk of hardware failure and ensure maximum uptime for your mining fleet.
Want to start earning digital gold today? Join Headframe and manage your revenue via our apps for iOS and Android. Mine with the professionals!